How to Read a Crochet Pattern: A Plain-English Decoder
Crochet patterns aren't complicated, they're shorthand. Learn abbreviations, the punctuation conventions, gauge, and how to decode a real pattern step by step.
On this page13 sections▾
A crochet pattern looks like a foreign language until you realize it's the same six things written in shorthand every time. The abbreviations look intimidating in your first pattern and invisible by your fifth. There is no advanced version of pattern-reading. Once you can decode the shorthand, you can decode every pattern.
This guide walks through the standard pieces. By the end, a line like "Row 3: Ch 1, sc in first st, *sk 1, dc in next st, ch 1, sc in next st; rep from * to last st, sc in last st. (15 sts)" will read as plainly as a recipe.
The structure every pattern follows
Every well-written crochet pattern has six parts in roughly this order.
The header. Designer name, finished dimensions, skill level, copyright info.
Materials. Yarn (brand, weight, color, yardage), hook size, notions (stitch markers, yarn needle, buttons, etc.).
Gauge. A specification like "12 sc x 12 rows = 4 inches in worsted weight on a 5mm hook." More on gauge in a moment.
Abbreviations. A key explaining the shorthand the pattern uses. Even though most abbreviations are standardized, every good pattern lists them at the top.
Pattern notes. Special techniques, color-change conventions, anything unusual about the construction.
The pattern itself. Row-by-row or round-by-round instructions, plus finishing instructions (fasten off, weave in ends, blocking).
If a pattern is missing any of these (especially gauge or abbreviations), it's either an old pattern or a poorly written one. You can still work it, but you may have to fill in blanks.
The abbreviations
The 12 abbreviations you'll see in 90% of patterns:
| Abbreviation | Meaning |
|---|---|
| ch | chain |
| sl st | slip stitch |
| sc | single crochet |
| hdc | half double crochet |
| dc | double crochet |
| tr | treble (or triple) crochet |
| st / sts | stitch / stitches |
| sp | space (a gap created by a chain in the previous row) |
| sk | skip |
| inc | increase (work two stitches into one stitch) |
| dec | decrease (work two stitches together as one) |
| yo | yarn over |
The 4 you'll see often enough to memorize:
| Abbreviation | Meaning |
|---|---|
| sc2tog | single crochet two together (one decrease method) |
| BLO / FLO | back loop only / front loop only |
| rep | repeat |
| rnd | round |
Different countries use different conventions. UK and US terms for the same stitches are different. US single crochet equals UK double crochet, for example. If a pattern uses unfamiliar terminology, check whether it's UK or US-style and convert.
The punctuation
This is where most beginners get stuck. The three punctuation marks aren't decorative.
Parentheses ( ) group instructions that should be treated as a unit.
"(sc, dc) in next st" means work both a sc and a dc into the same stitch.
"(2 dc, ch 2, 2 dc) in corner sp" means do all four things in the same corner space.
*Asterisks * and "rep from " mark a section to repeat.
"*ch 1, sk 1, sc in next st; rep from * across" means do the chain-skip-sc sequence repeatedly until you reach the end of the row.
"*ch 1, sk 1, sc in next st; rep from * 5 more times" means do it 5 more times after the first time (6 total iterations).
Stitch counts in parentheses at end of row are checkpoints.
"Row 3: sc in each st across. (24 sts)" means after this row you should have 24 stitches. Count. If you have 23 or 25, something went wrong.
These three conventions handle 95% of pattern punctuation. The remaining 5% (brackets, double asterisks for nested repeats) you'll learn by exposure.
How to read a real row
Take this line as an example:
"Row 5: Ch 2 (counts as first hdc here and throughout), hdc in next 4 sts, *2 hdc in next st, hdc in next 5 sts; rep from * across to last 2 sts, hdc in last 2 sts. (32 hdc)"
Decoded:
- Chain 2. The pattern is telling you this chain counts as the first hdc of the row.
- Work hdc into the next 4 stitches. Combined with the turning chain, you now have 5 stitches' worth of row 5 done.
- Asterisk marker. The repeat starts here.
- Work 2 hdc into the next single stitch. That's an increase.
- Work hdc into the next 5 stitches.
- End-of-repeat marker. Go back to the asterisk and do steps 4 and 5 again. Keep doing this until 2 stitches remain in the row.
- Work hdc into each of those last 2 stitches.
- Count. You should have 32 hdc. The opening turning-chain counts as the first one.
The structure of every pattern row is the same: a starting move (chain or special opener), a section that may or may not repeat, and a closing move. Once you see this shape, every row reads quickly.
Gauge, and why it matters more than you think
Gauge is the count of stitches and rows that fit in a four-inch (10 cm) square. Patterns specify it because the size of the finished item depends on it.
For non-fitted projects (blankets, dishcloths, bags), gauge is forgiving. Off by 10% and your blanket is just 10% bigger or smaller. Fine.
For fitted projects (sweaters, hats, socks), gauge is non-negotiable. Off by 10% in gauge produces a sweater off by roughly 10% in every dimension, which is the difference between fitting and not.
How to check gauge:
- Crochet a swatch in the pattern's stitch and yarn. Make it at least 6 inches square so you can measure inside the edges (which can be uneven).
- Lay it flat without stretching.
- Count the stitches across a 4-inch span and the rows across a 4-inch span.
- Compare to the pattern.
If you have too many stitches per 4 inches, your gauge is tight. Go up one hook size. Too few, your gauge is loose. Go down one hook size. Re-swatch. Don't start the project until your gauge matches.
Most beginners skip swatching, ruin their first fitted project, and never skip swatching again. You can have the lesson the hard way or just take it from this paragraph.
Yarn weights
Yarn weights are the universal categorization system for thickness. Patterns specify a weight category, and you substitute within the category.
| Weight | Common name | Typical hook size |
|---|---|---|
| 0 | Lace / thread | 1.5-2.25mm |
| 1 | Super fine / fingering / sock | 2.25-3.5mm |
| 2 | Fine / sport | 3.5-4.5mm |
| 3 | Light / DK | 4.5-5.5mm |
| 4 | Medium / worsted / aran | 5.5-6.5mm |
| 5 | Bulky / chunky | 6.5-9mm |
| 6 | Super bulky | 9-15mm |
| 7 | Jumbo | 15mm+ |
For your first patterns, stay in weight 4 (worsted). It's affordable, easy to find, fast enough to feel like progress, and thick enough that you can see your stitches.
The Craft Yarn Council's yarn weight system is the universal reference and worth bookmarking.
A pattern to read for practice
The fastest way to lock in pattern-reading is to read one start to finish without crocheting it. Pick a simple beginner pattern, read every row out loud, and make sure you can predict what each row's instruction means before checking the count at the end.
Spread the Dishcloth Joy
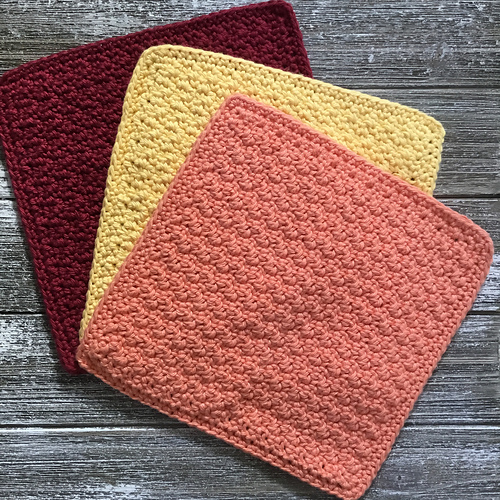
Find this pattern on HoneyBee
Catherine Richardson. Worsted weight, single crochet base with a small stitch repeat, beginner-friendly. The pattern is short enough to read in one sitting and contains all the conventions discussed above: a foundation chain, row-by-row instructions, a small repeat marked with asterisks, and stitch-count checkpoints. Read it. Then make it.
FAQ
What if a pattern uses an abbreviation I don't recognize?
Check the pattern's own abbreviations key first. If it's not listed, search the abbreviation plus "crochet" online; standardized abbreviations all resolve quickly. If the abbreviation is truly bespoke (some designers invent their own), the pattern should explain it in the notes.
How do I know if a pattern is UK or US terms?
The pattern usually says so explicitly. If not, look at what stitches the pattern uses. If the most common stitch is "double crochet" and the pattern produces a tight, short fabric, it's UK (where double crochet equals US single crochet). If "double crochet" produces a tall, open fabric, it's US.
My finished item is much bigger or smaller than the pattern says it should be.
Gauge mismatch. Re-read the gauge section above. Next time, swatch and adjust hook size before starting.
Related guides
- How to Crochet for Beginners
- How to Knit for Beginners
- Knitting vs Crochet
- Free Crochet Granny Square Patterns
Read one pattern start-to-finish before you crochet your next thing. The next pattern after that one takes half the time to decode.
More from the HoneyBee blog
Pattern round-ups, tutorials, and crafting inspiration from the HoneyBee community.
Read more articles