How to Crochet for Beginners: A First-Project Walkthrough
Learn to crochet from zero. Hook grip, slip knot, chain, the three core stitches, the mistakes everyone makes, and the dishcloth that teaches all of it.
On this page17 sections▾
The thing nobody tells beginners about how to crochet for beginners is that the hands learn before the brain does. You read the instructions once, your hands fumble through twenty stitches that look bad, and on stitch thirty you stop thinking about the steps. That transition takes a few hours, not weeks. The point of this guide is to get you to that switch as efficiently as possible, with a real project in your hands at the end.
You need a hook, some yarn, and one evening. The first stitches will be ugly. The fifth row will look like real crochet.
What to buy first
A 5mm (US H/8) aluminum hook and one skein of worsted-weight acrylic yarn in a light color. Total cost: roughly $5 to $10. Skip wool, bamboo hooks, and anything marketed as "premium" for the first project. Light-colored yarn matters more than price because you need to see your stitches. Dark navy and black yarn hide everything you're trying to learn.
Hook grip
Two grips exist. Try both. Use whichever feels less awkward.
Pencil grip. Hold the hook the way you'd hold a pencil, thumb and index finger about an inch from the tip. This is the grip most tutorials show.
Knife grip. Hold the hook overhand the way you'd hold a butter knife, thumb on top of the shaft. Slightly more leverage for tight stitches, slightly less precision.
Tension comes from the other hand. Wrap the working yarn (the strand coming from the ball) over your index finger and pinch it between your thumb and middle finger near the hook. The index finger acts as a fixed point that the yarn pivots over. If your stitches are too tight, the index finger is gripping too hard. If they're too loose, the yarn is flopping through.
Adjusting tension takes a few hundred stitches. Your hands figure it out without you thinking about it.
The slip knot and the foundation chain
Every crochet project starts with a slip knot. Make a loop in your yarn with the working end crossing over the tail. Reach through the loop and pull the working end partway through to make a second loop. Slide your hook through that loop and tighten by pulling the working end. The knot should slide along the hook with mild resistance.
From the slip knot, you build a foundation chain:
- Pass the hook under the working yarn (this is called a yarn over) so it catches a loop.
- Pull that loop through the loop on the hook.
That's one chain. Repeat. Count out loud. A foundation row for a dishcloth is 25 chains.
Two things go wrong here for beginners. The chains end up so tight that you can't fit the hook into them on the next row, and the chains end up uneven (some loose, some tight). Both fix themselves with practice. If your first chains are bad, pull the slip knot out and start over. It costs 30 seconds.
The three core stitches
You can make 80% of beginner patterns with single crochet, half double crochet, and double crochet. Learn them in that order.
Single crochet (sc)
- Insert the hook into the next stitch.
- Yarn over and pull a loop through. Two loops on the hook.
- Yarn over and pull through both loops. One loop on the hook.
Tight, dense, slow. The right stitch for amigurumi, bags, and anything that needs structure.
Half double crochet (hdc)
- Yarn over before inserting the hook.
- Insert the hook into the next stitch.
- Yarn over and pull a loop through. Three loops on the hook.
- Yarn over and pull through all three loops at once.
Taller than single crochet, faster to work up. The middle option, and arguably the most useful for blankets and scarves.
Double crochet (dc)
- Yarn over.
- Insert the hook into the next stitch.
- Yarn over and pull a loop through. Three loops.
- Yarn over and pull through two loops. Two left.
- Yarn over and pull through the remaining two loops.
Twice the height of single crochet. Drapes well. The right stitch for shawls, throws, and anything where you want air in the fabric.
At the end of each row, chain one (after sc), two (after hdc), or three (after dc), then turn the work over and start the next row. The chain at the end is called the turning chain. It gives the row height for the first stitch.
The mistakes every beginner makes
Your stitches get progressively tighter. Your hands are tensing without you noticing. Take breaks every 10 minutes for the first hour. Shake your hand out. The tension issue is gone in two weeks of regular practice.
You can't see where to insert the hook. Beginner patterns say "insert the hook into the next stitch," but at first every stitch looks like a tangle. Look for the V at the top of each stitch (it's two strands forming a small V). Insert the hook under both strands of that V. Once you can see the V, you can see the stitch.
You lose count of your row. Put a stitch marker (or a paperclip, or a small loop of contrast yarn) in the last stitch of each row. When you finish a row, count and compare against the expected count. Catching a missing stitch in the row you made it is five minutes of frogging. Catching it ten rows later is an hour.
You add or drop stitches at the row edges. This is the most common beginner issue and the reason your work looks trapezoidal instead of rectangular. The fix is two specific habits: always work the last stitch of a row into the turning chain of the previous row, and count after every row.
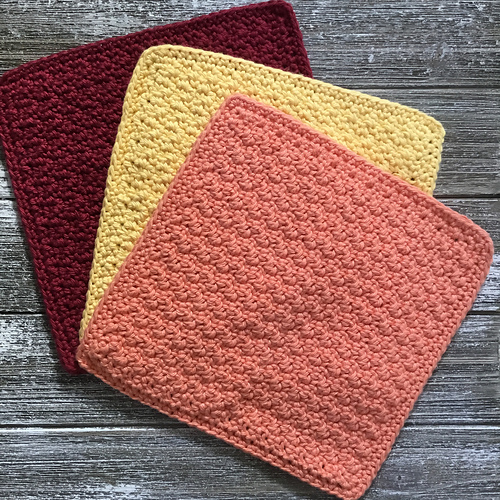
Your first real project
A dishcloth. Small, fast, useful, forgiving. Mistakes in a dishcloth don't matter; you'll use it to wipe a counter, not display it. Chain 25, single crochet across (24 sc), then hdc rows or sc rows until it's roughly square. Fasten off by cutting the yarn, pulling the tail through the last loop, and weaving the tail into the fabric with a yarn needle.
When you want a pattern instead of improvising:
Spread the Dishcloth Joy
Find this pattern on HoneyBee
Catherine Richardson. Worsted weight, single crochet, the canonical first-real-pattern. Includes a stitch repeat that gives the dishcloth texture without complexity. Finishes in a couple of hours.
Sunrise Coaster

Find this pattern on HoneyBee
Toni Lipsey. Worsted weight, worked in the round. A coaster instead of a dishcloth, which is useful if you want to learn working in the round (the starting move for amigurumi). Each coaster finishes in 30 minutes, so a set of four is one evening.
What to learn next
Once your dishcloth is done, the natural next steps depend on what you want to make. If you want a blanket, the next thing to learn is the granny square (one of the most-used building blocks in crochet). If you want stuffed toys, learn the magic ring (the starting move for working in the round, which is how every amigurumi begins). If you want something to wear, a simple cowl or beanie is the right next size up from a dishcloth.
For yarn weight standards and conversions you'll see referenced in every pattern, the Craft Yarn Council's yarn weight system is the universal reference.
FAQ
How long does it take to get good at crochet?
You'll have a usable dishcloth in 3 to 5 hours of actual stitching, spread across as many sittings as you want. "Feels natural" takes 10 to 20 hours. "Can read most patterns and complete them" takes around 40 hours of varied practice. Most people clear that bar in their first two months.
Should I learn crochet or knitting first?
Crochet, if you're picking between them. One active loop instead of dozens, mistakes that don't cascade, faster initial gratification. Knitting becomes the more meditative craft once you're past the learning hump, but the hump is steeper.
What if I'm left-handed?
Crochet exactly the way the tutorials show, but flipped. Watch a right-handed tutorial in a mirror, or look for tutorials explicitly tagged left-handed. The mechanics are identical; only the dominant hand changes.
Related guides
- How to Knit for Beginners
- Knitting vs Crochet: Which Should You Learn First
- How to Read a Crochet Pattern
- Free Crochet Coaster and Placemat Patterns
Pick up a hook and chain twenty-five. The first dishcloth is between you and the rest of crochet.
More from the HoneyBee blog
Pattern round-ups, tutorials, and crafting inspiration from the HoneyBee community.
Read more articles