HoneyBee

By Craft

  • Crochet Patterns
  • Knitting Patterns

By Type

  • Sweaters
  • Blankets
  • Hats
  • Amigurumi
  • Scarves
  • Shawls

By Skill Level

  • Beginner
  • Easy
  • Intermediate
  • Advanced

By Yarn Weight

  • Worsted
  • DK
  • Bulky
  • Fingering

© 2026 HoneyBee. All patterns link to their original sources.

AboutGlossaryToolsHoneyBee+PrivacyTermsCopyrightFor Worker Bees →
AHosted by Andrea Quinteros

Poncho Crochet Along

You're on the free step — the other 3 steps, the video walkthroughs, and the live feed come with full access.
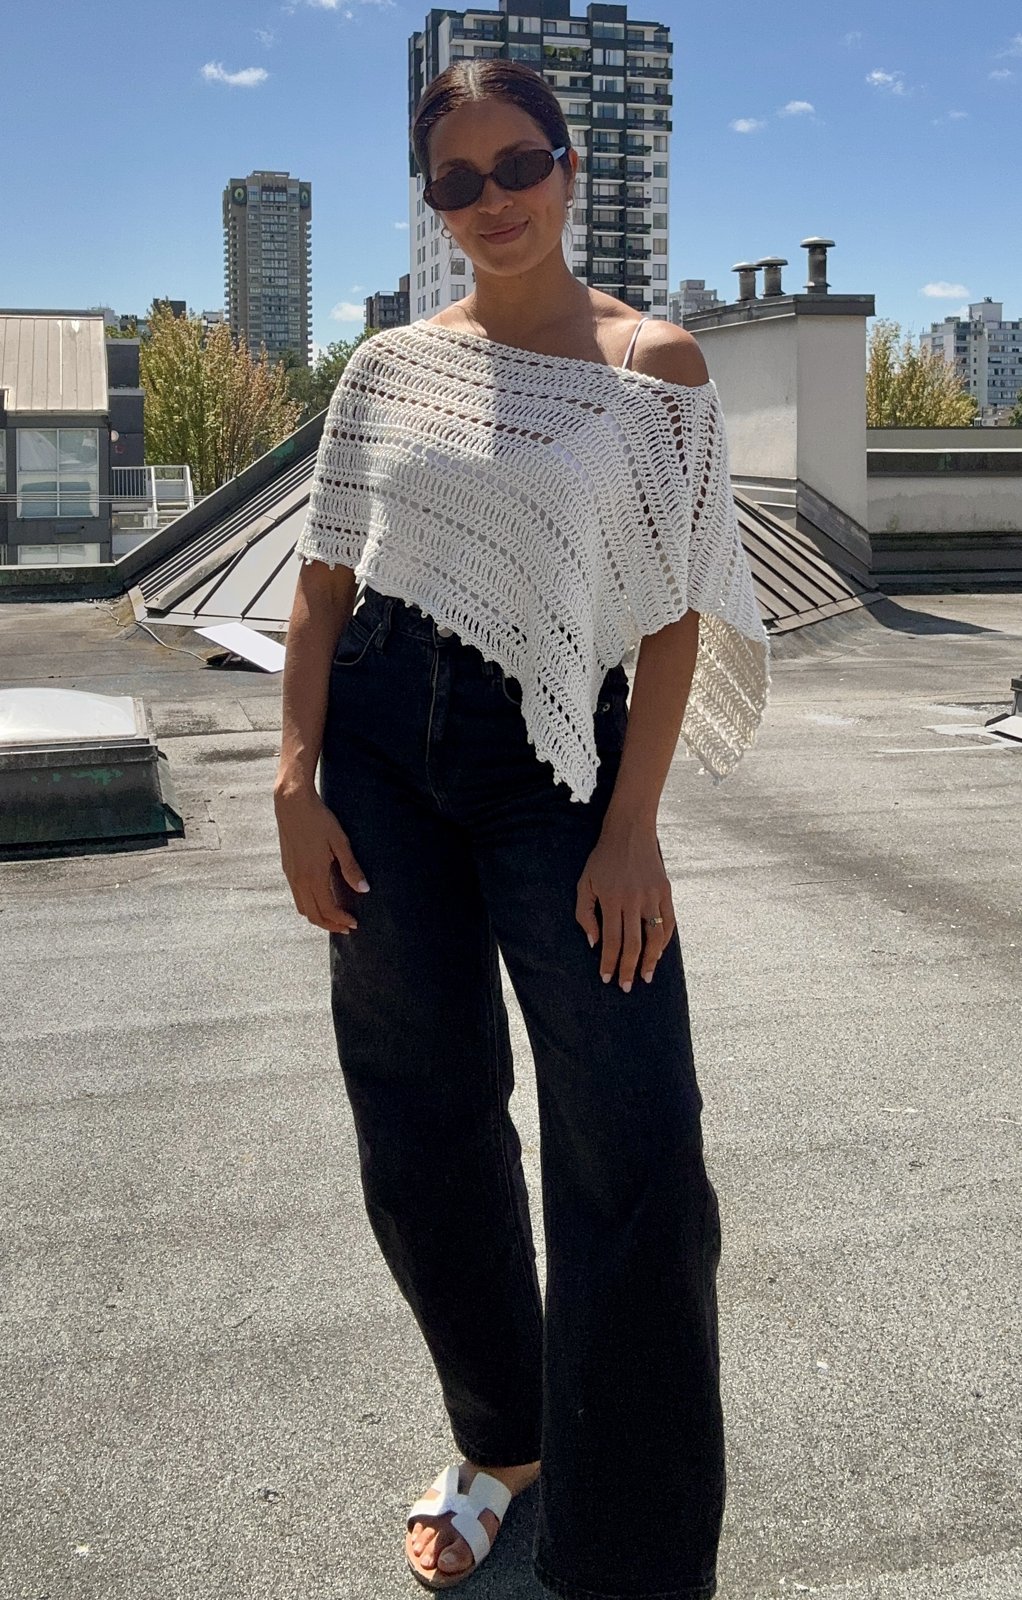
Finished poncho reference
The finished bohemian poncho
The finished poncho you're making.
Step 1Free

Setup & your first rows

CH: ChainDC: Double CrochetSC: Single CrochetTC: Treble Crochet

0 of 8 steps done

Welcome to the Poncho CAL! 🧥

Welcome to our second ever Crochet Along! We are thrilled you are here to make this beautiful bohemian poncho.

This week you'll take your one key measurement, make your foundation chain, and crochet your first full panel.

What you'll need

Yarn: You can technically use any yarn as this will be made to measure. For reference, I used 100% cotton yarn, DK weight (size 3). Total yardage varies with your size and length — we recommend buying a little extra to be sure you have enough.

  • Small (sample): ~550 yds / 500 m

This is a rough estimate on yarn. You may need more or less so please keep this in mind.

Hook: Your hook size will depend on the yarn you are using. However, since we want this to be flowy and the stitches to be more open, I'd recommend going for a bigger hook. For reference, I am using a 5 mm hook.

Gauge: Made to measure — no strict gauge needed

Other accessories: Stitch markers, Yarn needle, Scissors

1. Take Measurement A

To begin you need what we will call Measurement A: the top of your shoulders, down your arm, to where you want the poncho to end.

💡 For Andrea that is 24.5" (62.2 cm). The first poncho she made was a bit smaller (Measurement A of 23" / 58.4 cm), but she wanted this one more oversized, so she went with 24.5" (62.2 cm).

2. Make your foundation chain

💡 With her tension and a 5 mm hook, Andrea chained 79. Your tension will be different than hers, so don't copy the number.

3. Know your increase side

One thing to keep straight before the rows begin:

  • The side of the panel where your tail is will be your increase side. When you are on this end of your panel, you will need to make increases on Rows 1–8, and on every Increase Row after that (your TC rows).
  • The other side of the panel is your non-increase side — you will not do any increases there.

4. The row repetition

Step 2: Complete your first panel

Included with full access

Unlock

Step 3: The second panel

Included with full access

Unlock

Step 4: Assembly & finishing

Included with full access

Unlock
m

mad44039 · 20d

tyvm Andrea I am working row 2 edge, that where I have crochet problems, my edges. Thank you again.

A

Andrea Quinteros · 19d

Of course! If you have instagram reach out on there either at @andreaquinteros or @thehoneybeeclub and I can help guide you with photos/videos if needed🥰

c

clobdaipad · 15d

Hello everyone! I'm totally late to the game - chiming in from Bermuda 🇧🇲! I'm only starting my poncho tonight.

c

clobdaipad · 15d

Question: did we get a written pattern as well?

A

Andrea Quinteros · 14d

Hi there! It's never too late to start 🥰 Welcome! And the written instructions will be under each "Step" ☺️. Then everything is broken down to make it easier to follow, and you can click off each row as you make it (making it more interactive).

The live community feed

Ask Andrea questions as you make, share your progress, and stitch alongside the hive — this room is where projects actually get finished.

Get full access
Ask Andrea a question…Join to chat